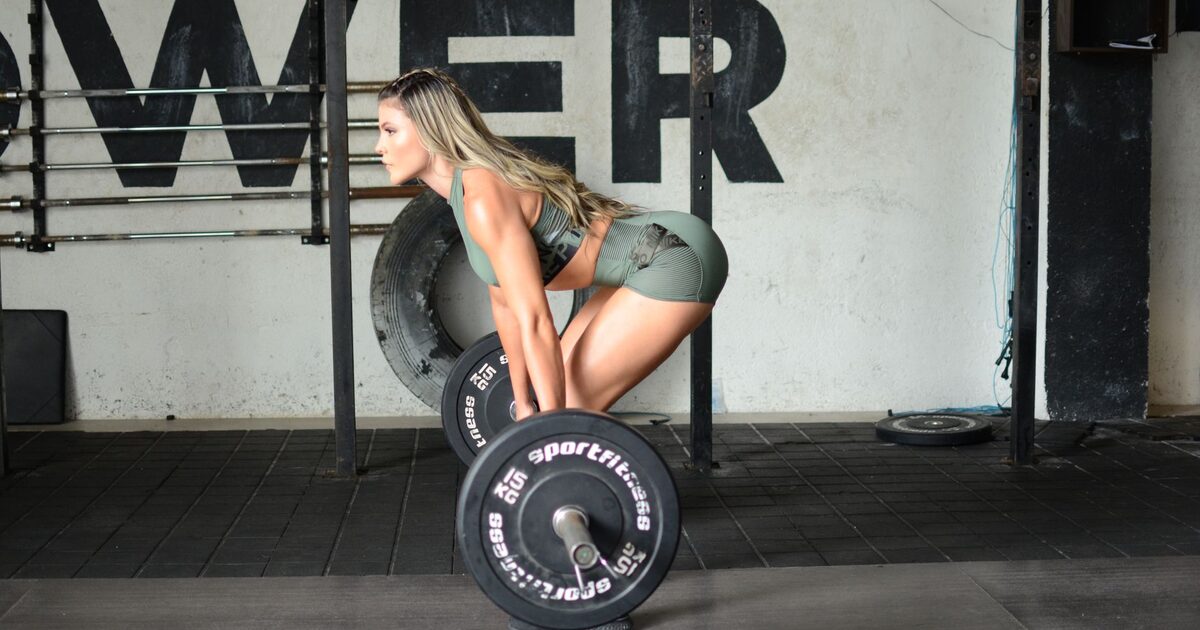
The deadlift has a worse reputation than it deserves. It isn't a dangerous lift — it's an unforgiving one. Most "deadlift hurt my back" stories are really about too much weight too soon, or a brace that fell apart on rep five. Get the hinge right and it becomes one of the most useful things you can do in a gym: a full-body pull that teaches you to lift heavy objects off the floor without paying for it later. Here's how to set up, brace, and pull so the load goes through your legs and hips instead of your lower back.
First, learn the hinge — not the squat
A deadlift is a hip hinge, not a squat with a bar in your hands. The difference is where the movement comes from. In a hinge, your hips travel backward and your torso folds forward over relatively stationary shins; your knees bend only a little. People who turn it into a squat drop their hips too low, shove their knees forward, and end up dragging the bar around their kneecaps — which pulls it away from the body and loads the spine.
Drill the pattern before you load it. Hold a dowel flat against your back so it touches three points: the back of your head, between your shoulder blades, and your tailbone. Push your hips back and let your chest tip toward the floor while keeping all three in contact. If the stick leaves your upper or lower back, you've rounded or arched — reset. That neutral-spine feeling is what you're protecting under load. Romanian deadlifts (RDLs) with a light bar are the next step up: same backward hip drive, soft knees, bar grazing your thighs.
The setup, from the floor up
A good pull is mostly won before the bar moves. Walk through it the same way every time:
- Bar over midfoot. Position the bar roughly over the middle of your foot — about an inch from your shins, under your shoelaces. This is the single most important position. Too far forward and you'll lurch toward it; too close and you'll bang your shins.
- Stance hip-width. For a conventional pull, feet sit about hip-width apart with toes turned slightly out — narrower than most beginners expect, closer to a vertical-jump stance than a squat stance.
- Hands just outside the knees. Hinge down and grip so your arms hang just outside your legs. Don't drag the bar to your hands; bend to meet it.
- Set shins and shoulders. Drop your hips until your shins nearly touch the bar — they should be close to vertical. Your shoulders end up slightly ahead of the bar, not stacked over it, and your hips sit higher than in a squat.
- Pull the slack out. Take a firm grip and pull up gently until the plates click against the collar. You want tension in the system, not a jerk from a dead stop.
This start-from-the-floor position matters more here than on a bench press or an overhead press, where the bar begins from the top with the weight already racked.
Brace before you pull — and hold it
Your spine is protected by pressure, not by sucking your chest up. Before the bar moves, take a breath into your belly and brace 360 degrees, as if you're about to be lightly punched in the stomach — push out against your abs and obliques all the way around, not just to the front, and keep your ribs down rather than flared. Hold that pressure for the entire rep and only breathe out at the top. A brace that leaks halfway up is when good reps go bad.
Two cues lock the upper back in: "bend the bar around your shins" and "squeeze oranges in your armpits." Both fire up your lats, which keep the bar pinned to your body. A bar that drifts forward even a couple of inches multiplies the leverage on your lower back — keeping it close is a safety feature, not just a strength trick.
The pull: push the floor away
Stop thinking about lifting the bar up. Think about pushing the floor away with your feet, like a leg press. The bar should drag up your shins and thighs, staying in contact the whole way. Drive through your whole foot — feel the middle and heel, not your toes.
Here's the rule that saves backs: your hips and shoulders rise at the same rate. The most common way to get hurt is letting the hips shoot up first. Your legs straighten while the bar is still on the floor, and the lift turns into a stiff-legged yank with your back doing a job your quads should have started. Film yourself from the side and watch for the hips rising faster than the chest — that's the fault to kill before you add weight.
Finish by standing tall and squeezing your glutes hard. That's the lockout. Do not lean back or hyperextend your spine to "prove" you finished — leaning back is a real source of lower-back tweaks and does nothing for the lift. Glutes tight, ribs stacked over hips, done. To lower it, hinge the way you came up: push your hips back first, then bend the knees once the bar passes them.
Where it goes wrong, and the fix
| Fault | Why it's risky | The fix |
|---|---|---|
| Rounded lower back | Shifts load from muscle to spinal structures | Re-brace; lighten the load; relearn the dowel hinge |
| Hips shoot up first | Becomes a stiff-legged yank on the lumbar spine | "Hips and shoulders together"; push the floor away |
| Bar drifts forward | Multiplies leverage on the lower back | Engage lats; drag the bar up the legs |
| Leaning back at lockout | Hyperextension stresses the spine | Stand tall, squeeze glutes, stop there |
| Soft, squishy shoes | Unstable base leaks force into wobble | Flat-soled shoes or lift barefoot |
One honest note on pain: deep muscular fatigue in your glutes, hamstrings, and lower back is normal. A sharp, localised, "something just went" pain is not — rack the bar and stop. That's almost always a signal that the weight got ahead of your technique.
Grip, bar height, and the friendliest variation
Your grip will often quit before your legs do. Start double-overhand (both palms facing you). When the bar slips, switch to a mixed grip (one palm toward you, one away) or use straps. With a mixed grip, keep the underhand arm's elbow locked straight — never let it bend under load.
Standard plates put the bar about 8.75 inches (22 cm) off the floor. If you can't reach that height with a neutral spine — common if you're tall or new to hinging — don't round your back to get there. Pull from blocks or low mats until your mobility catches up.
If conventional deadlifts keep tweaking your back, try a trap-bar (hex-bar) deadlift. You stand inside the bar and hold the handles at your sides, which keeps your torso more upright and reduces shearing stress on your lower back. It's the most back-friendly way to load a heavy hinge and an excellent default for general strength. You'll find these variations — conventional, Romanian, and trap-bar — in our exercise library with demo videos for each.
Programming it without getting hurt
Deadlifts are taxing, so you don't need many. Two to four working sets of 3 to 6 reps, once or twice a week, is plenty for building strength. As a beginner, reset every rep — let the bar settle, re-brace, and pull again — rather than bouncing it off the floor, which is where form quietly degrades. Add load slowly: the deadlift tempts you to jump weight fast, but small, consistent increases beat ego-loading every time.
Strength is built between sessions, so recovery matters as much as the pull. Enough protein (roughly 1.6–2.2 g per kg of bodyweight per day) and enough sleep are what let you come back stronger, and a few high-protein recipes in your week make that target far less of a chore.
Treat the deadlift as a skill you practise, not a max you test. Film your sets, log every working set, and keep the bar close. The FitBot Coach app stores your history per lift so you walk up to the bar knowing exactly what to beat — which is how the weight climbs while your back stays where it should.
Key takeaways
- A deadlift is a hip hinge, not a squat: hips travel back, shins stay near vertical, knees bend only a little.
- Set the bar over your midfoot (about an inch from the shins) and drag it up your legs to keep leverage off your spine.
- Brace 360 degrees before you pull and hold the breath until lockout; a brace that leaks is when reps go bad.
- Hips and shoulders must rise at the same rate; hips shooting up first turns the lift into a back-wrecking yank.
- Lock out by squeezing your glutes, not by leaning back; the trap-bar variation is the most back-friendly option.
Frequently asked questions
Are deadlifts bad for your lower back?
No. Deadlifts done with a neutral spine and a solid brace are a safe, effective way to train your back, hips, and legs. Most injuries come from too much weight too soon or form breaking down under fatigue, not from the lift itself.
Should I use a trap bar or a straight bar?
Both are good. A trap (hex) bar lets you hold the load at your sides, which keeps your torso more upright and reduces stress on the lower back, making it the friendlier starting point. A straight bar carries more directly to powerlifting and heavier loading once your hinge is solid.
How do I stop my back from rounding?
Rounding usually means the weight is too heavy or your brace is weak. Lighten the load, take a full breath into your belly, and brace 360 degrees before you pull. Practising the dowel hinge and Romanian deadlifts grooves the neutral-spine pattern you need.